0%

Day17 - 藉由DialogFlow Fulfillment 實踐對話流設計

藉由Google Cloud Function建構DialogFlow Fulfillment

diagram
透過GCP上的Cloud Function這項SaaS (Software as a Service) 服務,
我們能輕鬆快速地建構DialogFlow Fulfillment來達成我們今日的需求。
你也能參見官方撰寫於Qwiklabs的實作範例。
Google Assistant: Build an Application with Dialogflow and Cloud Functions

開啟內建編輯器

如果各位尚未進行任何設定,可以先完成下列文章的教學再接續下方的步驟
[Day12] 於DialogFlow中實踐對話流設計

  1. 首先,前往「Fulfillment」分頁。
    開啟Inline Editor的功能,我們將透過他於GCP上建立雲端函式。
    並以此撰寫程式來客製化回應。
    image

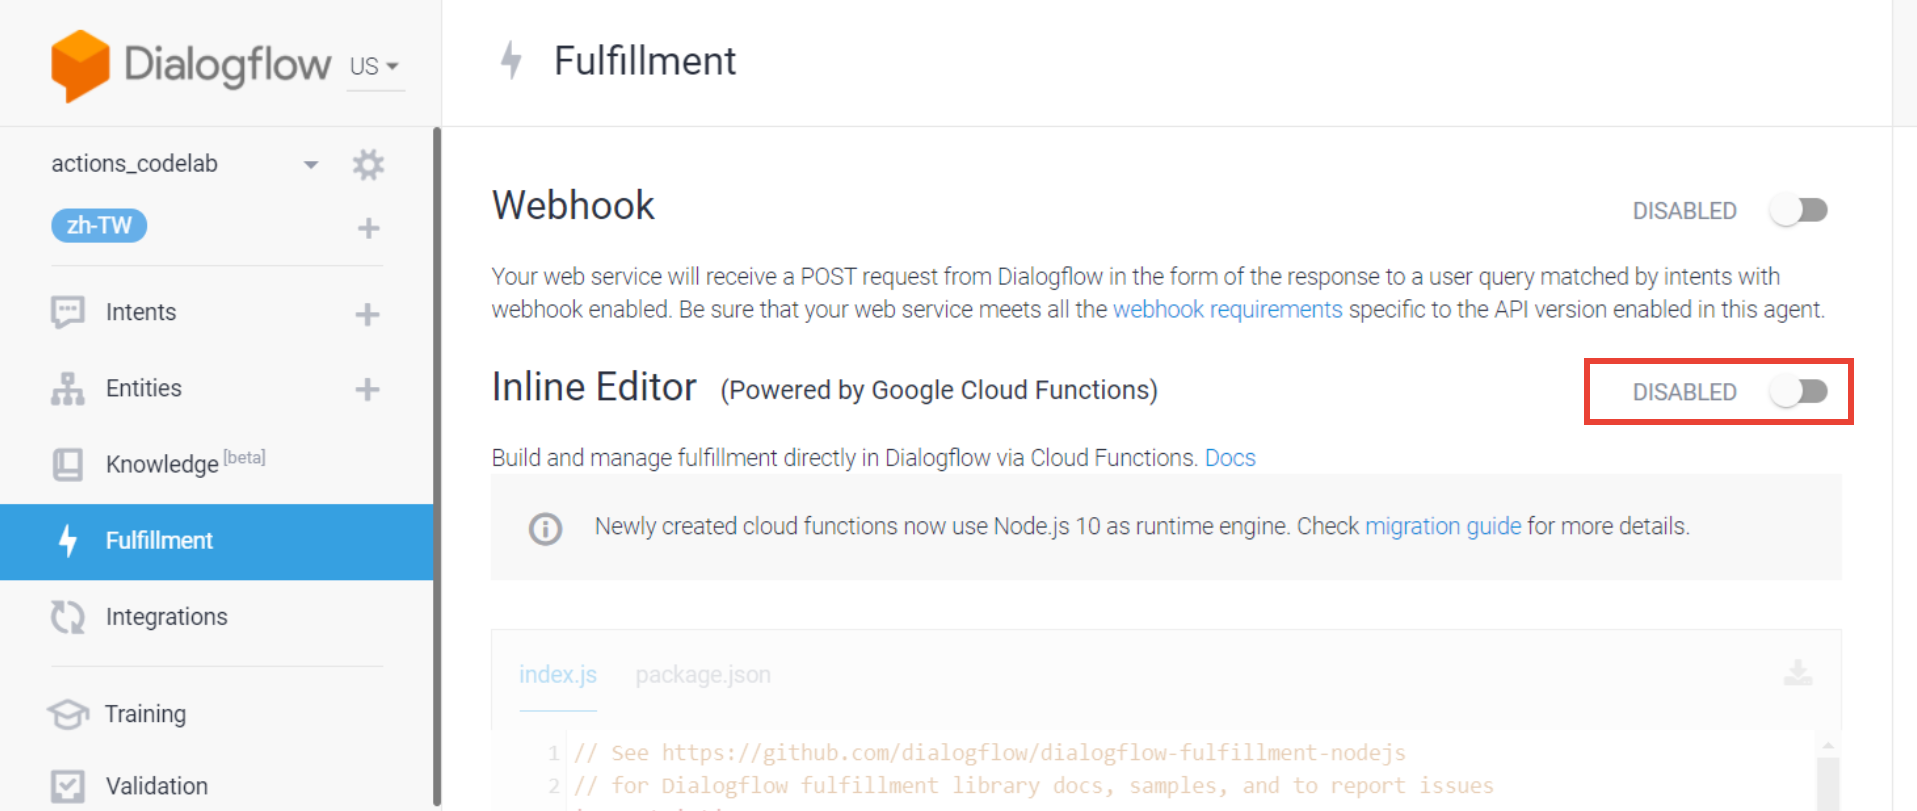
  2. 開啟該功能後,系統會提示需要啟用GCP的付費功能。
    請點擊「OPEN CLOUD CONSOLE」繼續操作。
    image

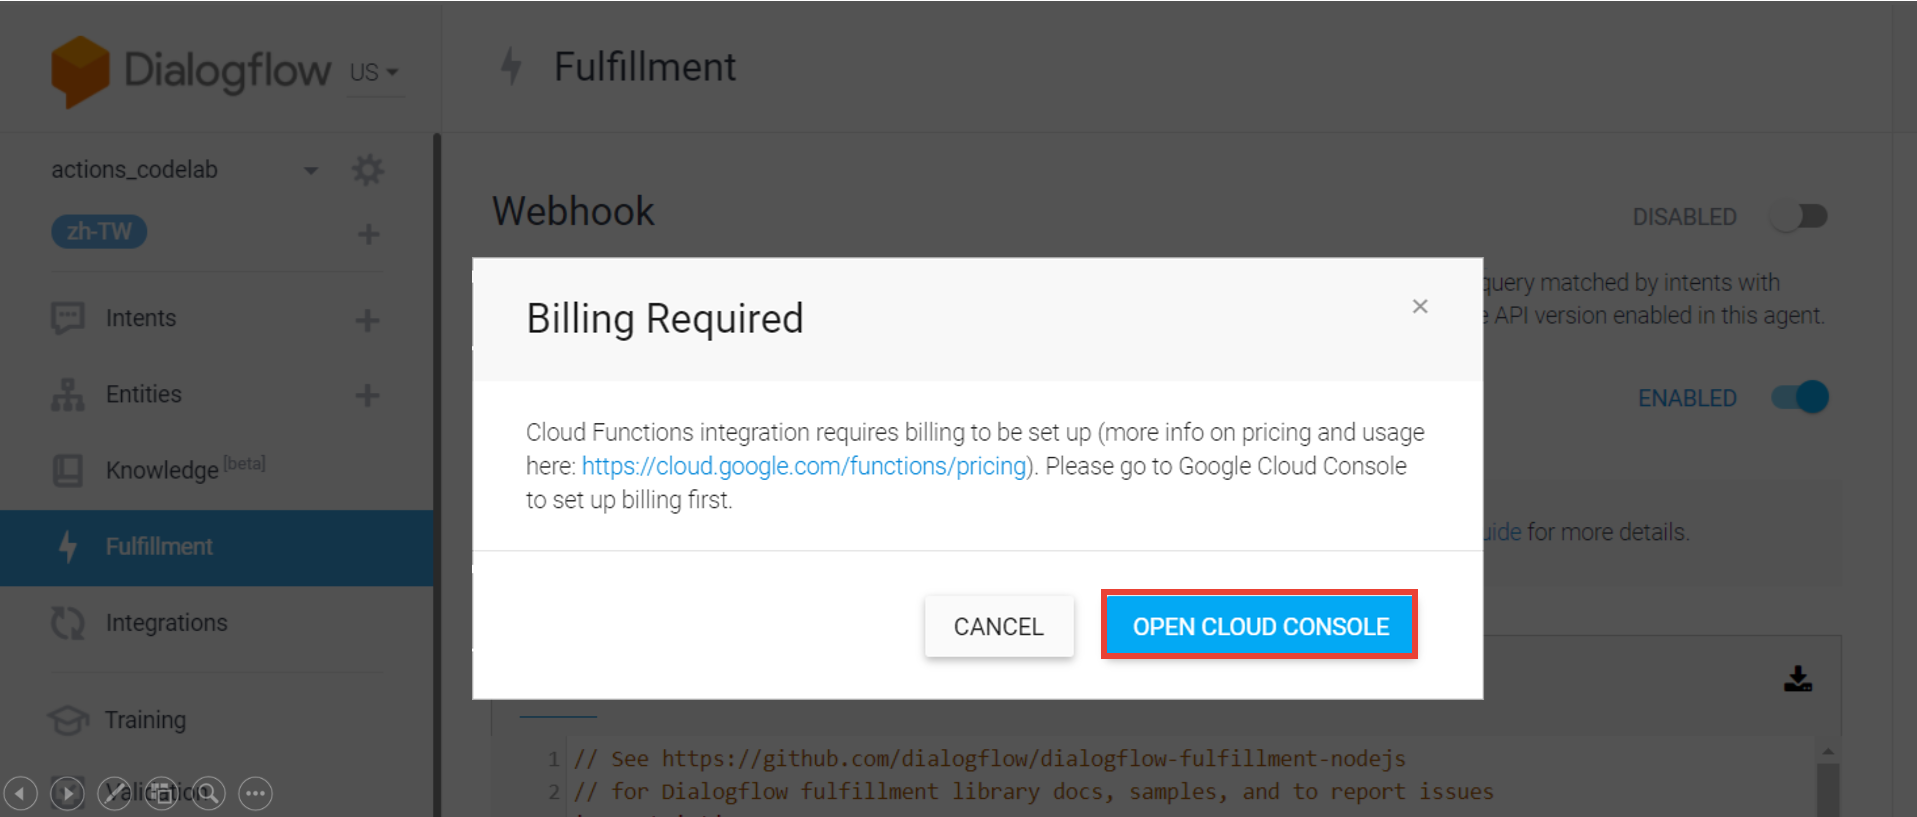
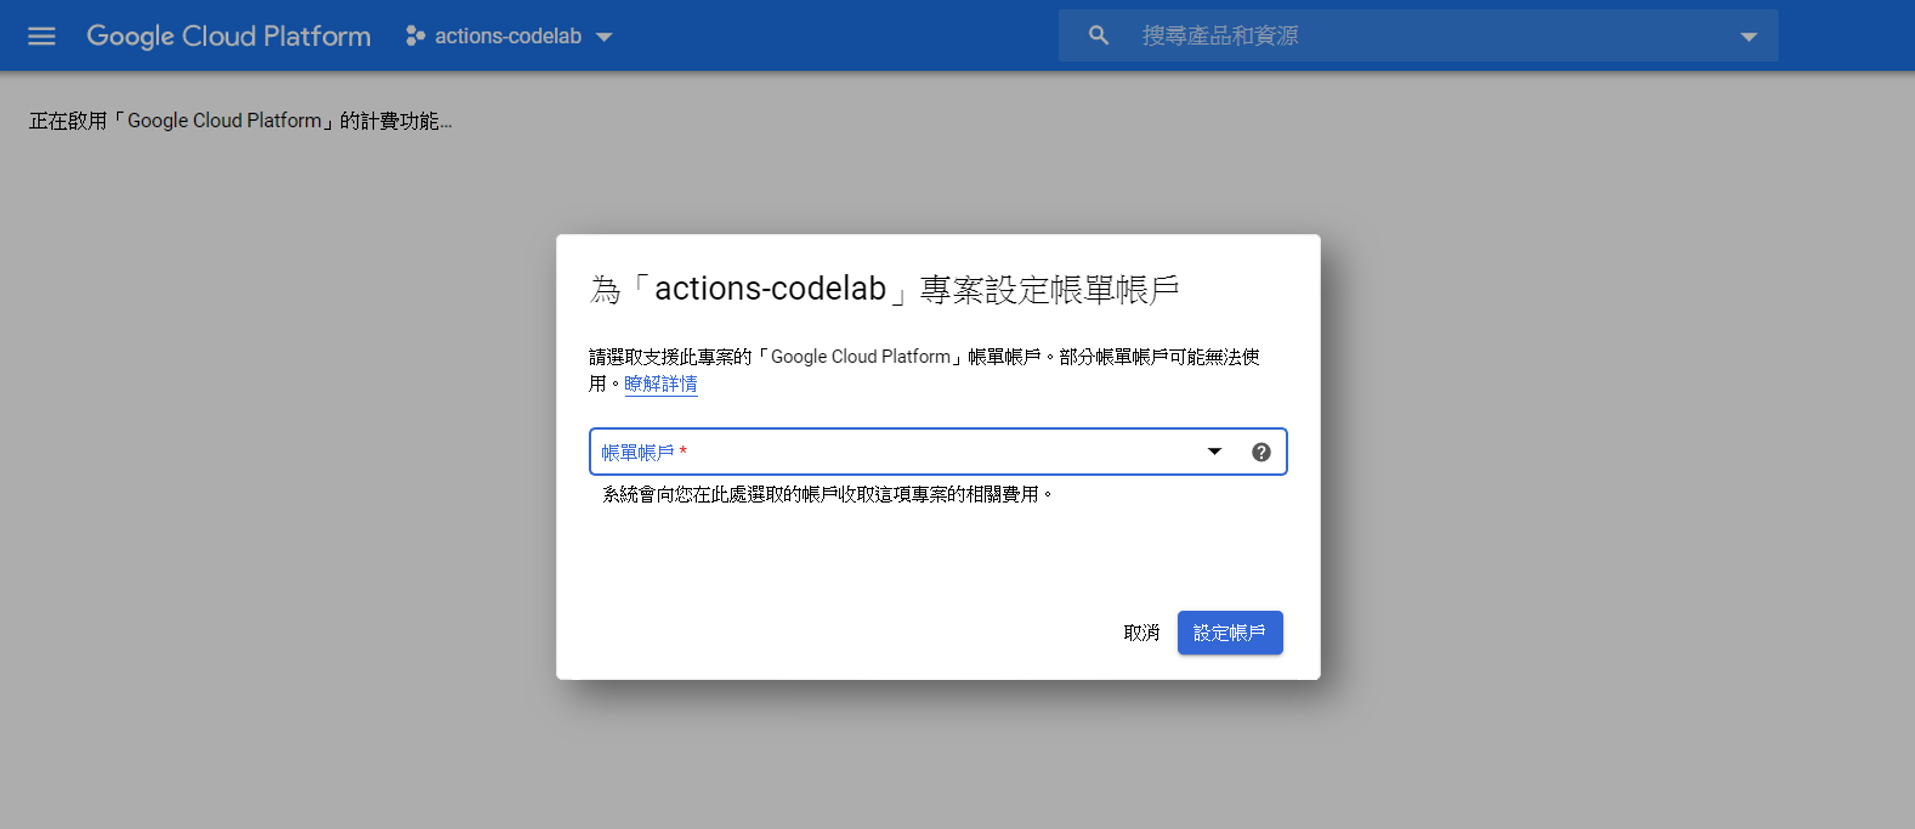
  3. 跟著系統的導引建立帳單帳戶,並將其綁訂到這個專案上
    image

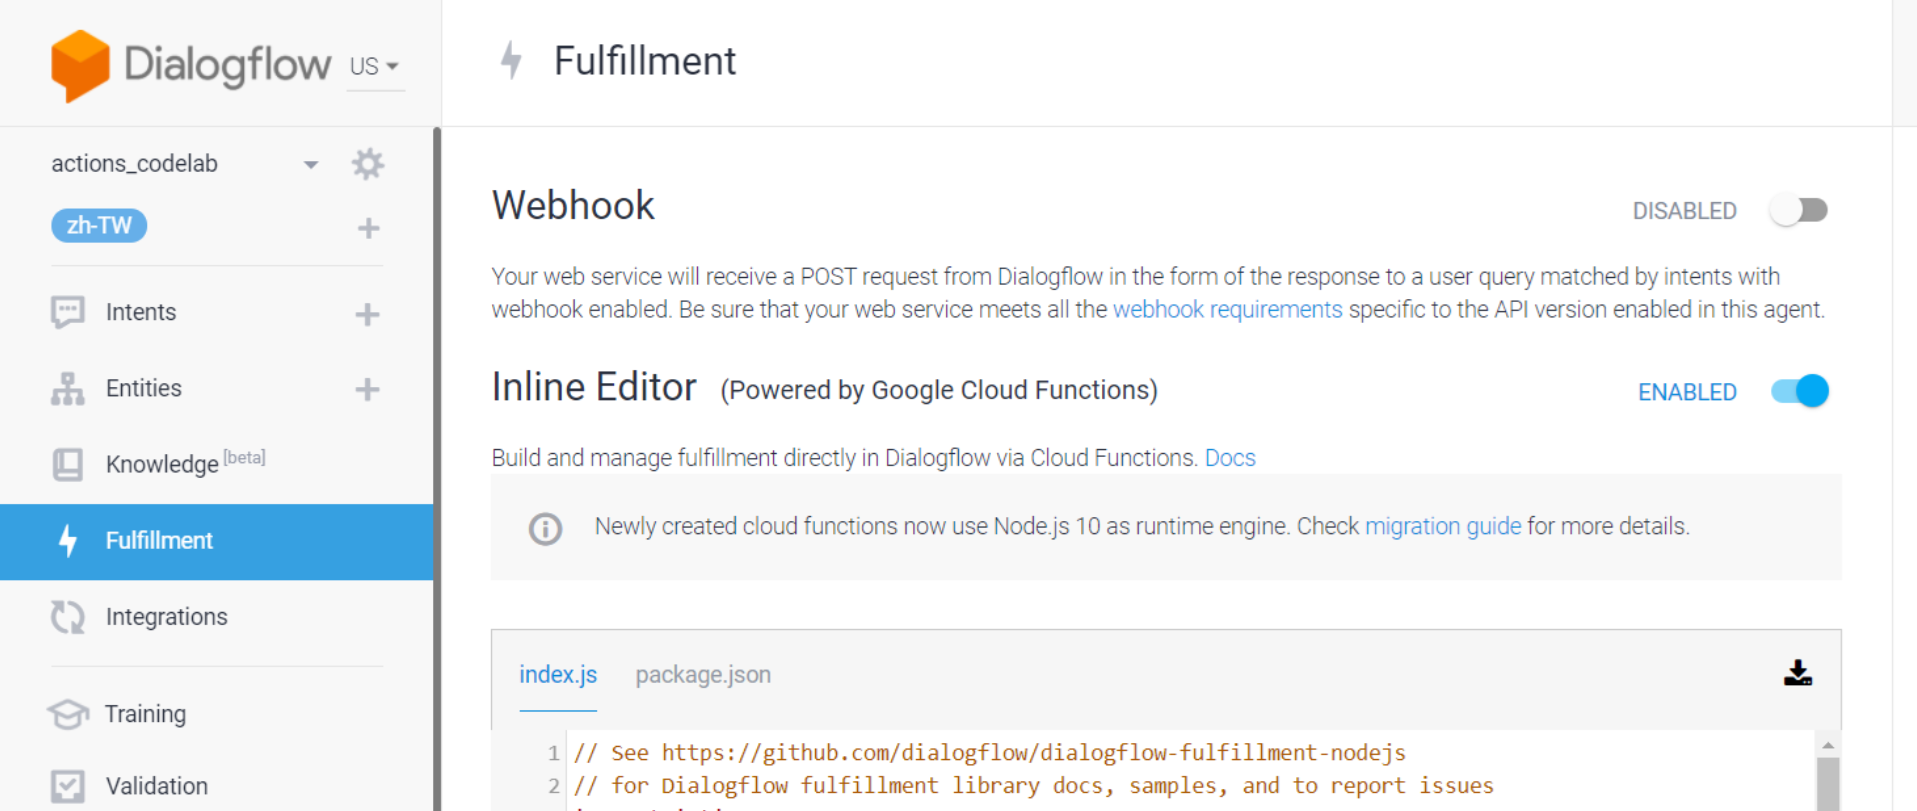
  4. 現在,你已經成功開啟我們所需要的雲端編輯器啦!
    image

透過Fulfillment修改Intent的回應
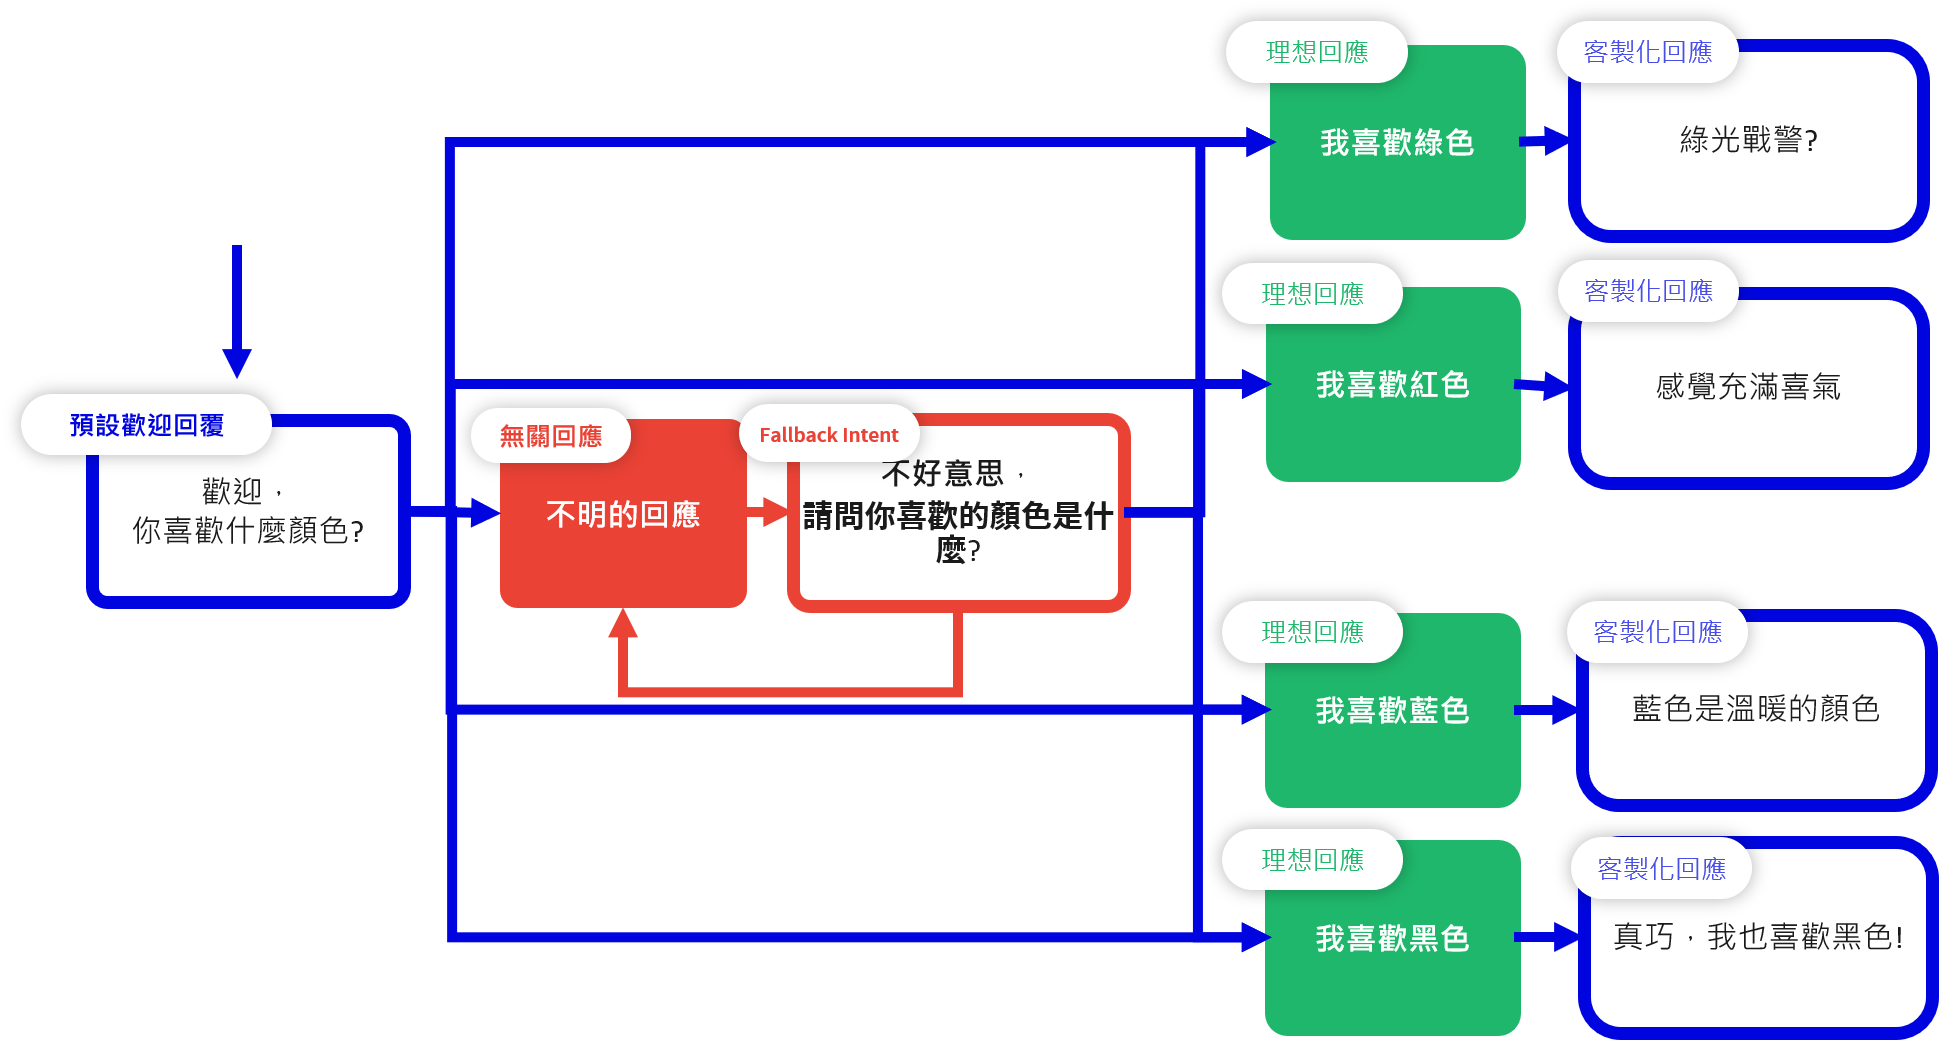
image

依照我們先前所提及的架構。
來客製化我們先前要設計的對話。

1. 複製貼上以下程式片段到「index.js」,取代原有的程式碼

1
2
3
4
5
6
7
8
9
10
11
12
13
14
15
16
17
18
19
20
21
22
23
24
25
'use strict';

// Import the Dialogflow module from the Actions on Google client library.
const {dialogflow} = require('actions-on-google');

// Import the firebase-functions package for deployment.
const functions = require('firebase-functions');

// Instantiate the Dialogflow client.
const app = dialogflow({debug: true});

// Handle the Dialogflow intent named 'favorite color'.
// The intent collects a parameter named 'color'.
app.intent('用戶輸入的顏色', (conv, {color}) => {

// Respond with the specific response and end the conversation.
if(color==="綠色"){conv.close('綠光戰警?');}
else if(color==="紅色"){conv.close('感覺充滿喜氣');}
else if(color==="藍色"){conv.close('藍色是最溫暖的顏色');}
else {conv.close('真巧,我也喜歡'+color);}

});

// Set the DialogflowApp object to handle the HTTPS POST request.
exports.dialogflowFirebaseFulfillment = functions.https.onRequest(app);

2. 複製貼上以下程式片段到「package.json」,取代原有的程式碼

1
2
3
4
5
6
7
8
9
10
11
12
13
14
15
16
17
18
19
20
21
22
{
"name": "dialogflowFirebaseFulfillment",
"description": "This is the default fulfillment for a Dialogflow agents using Cloud Functions for Firebase",
"version": "0.0.1",
"private": true,
"license": "Apache Version 2.0",
"author": "Google Inc.",
"engines": {
"node": "10"
},
"scripts": {
"start": "firebase serve --only functions:dialogflowFirebaseFulfillment",
"deploy": "firebase deploy --only functions:dialogflowFirebaseFulfillment"
},
"dependencies": {
"actions-on-google": "^2.2.0",
"firebase-admin": "^5.13.1",
"firebase-functions": "^2.0.2",
"dialogflow": "^0.6.0",
"dialogflow-fulfillment": "^0.5.0"
}
}

額外補充

在Fulfillment之中,我們能擷取來自Dialogflow的資料進行判斷並據此回覆。
在我們的範例中,擷取的資料是「用戶輸入的顏色」這個Intent所擷取的參數(Entities)「color」。
而上述的「index.js」所做的事是判斷參數「color」的數值來給予回應。
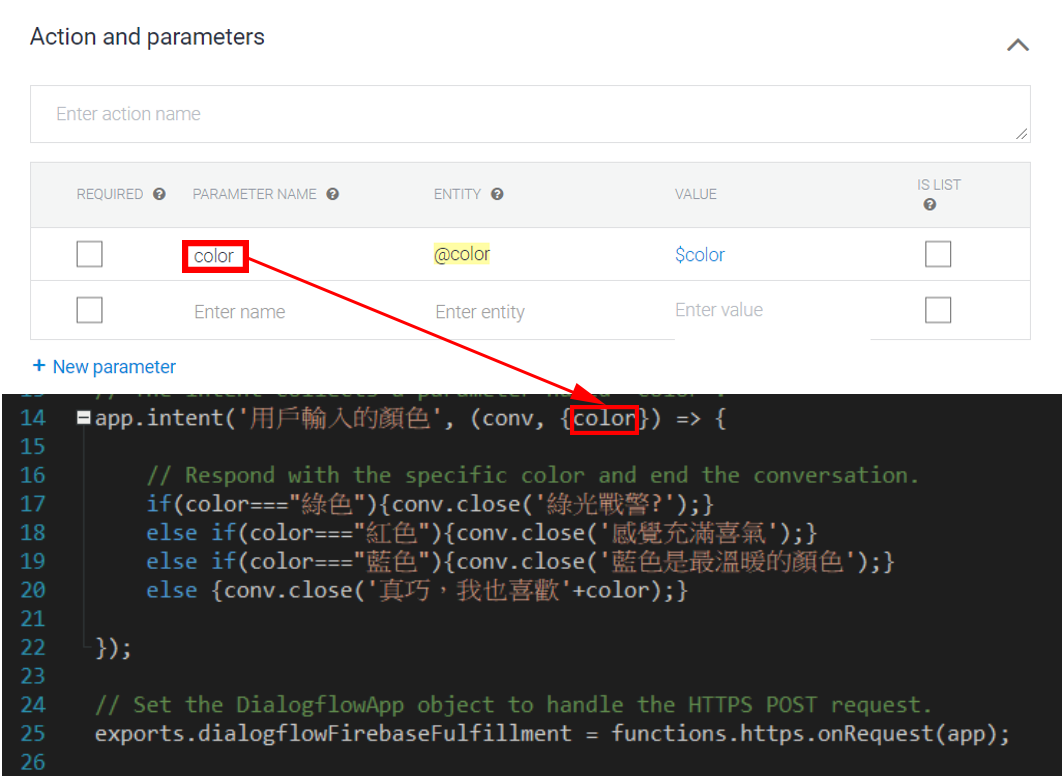
image

後續步驟

前往「用戶輸入的顏色」這個Intent的設定頁面。
至頁面最底部的「Fulfillment」,
開啟「Enable webhook call for this intent」
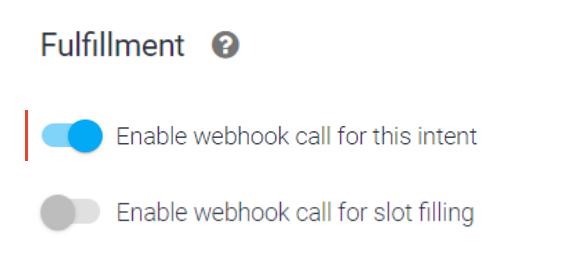
image

在Google助理上試用

請參照以下教學的詳細步驟
[Day13] 前往Actions On Google平台試用

現在,你可以前往 Actions on Google Developer Console進行測試了,
看看你的Action是否有照著Fulfillment設定的邏輯進行回應!
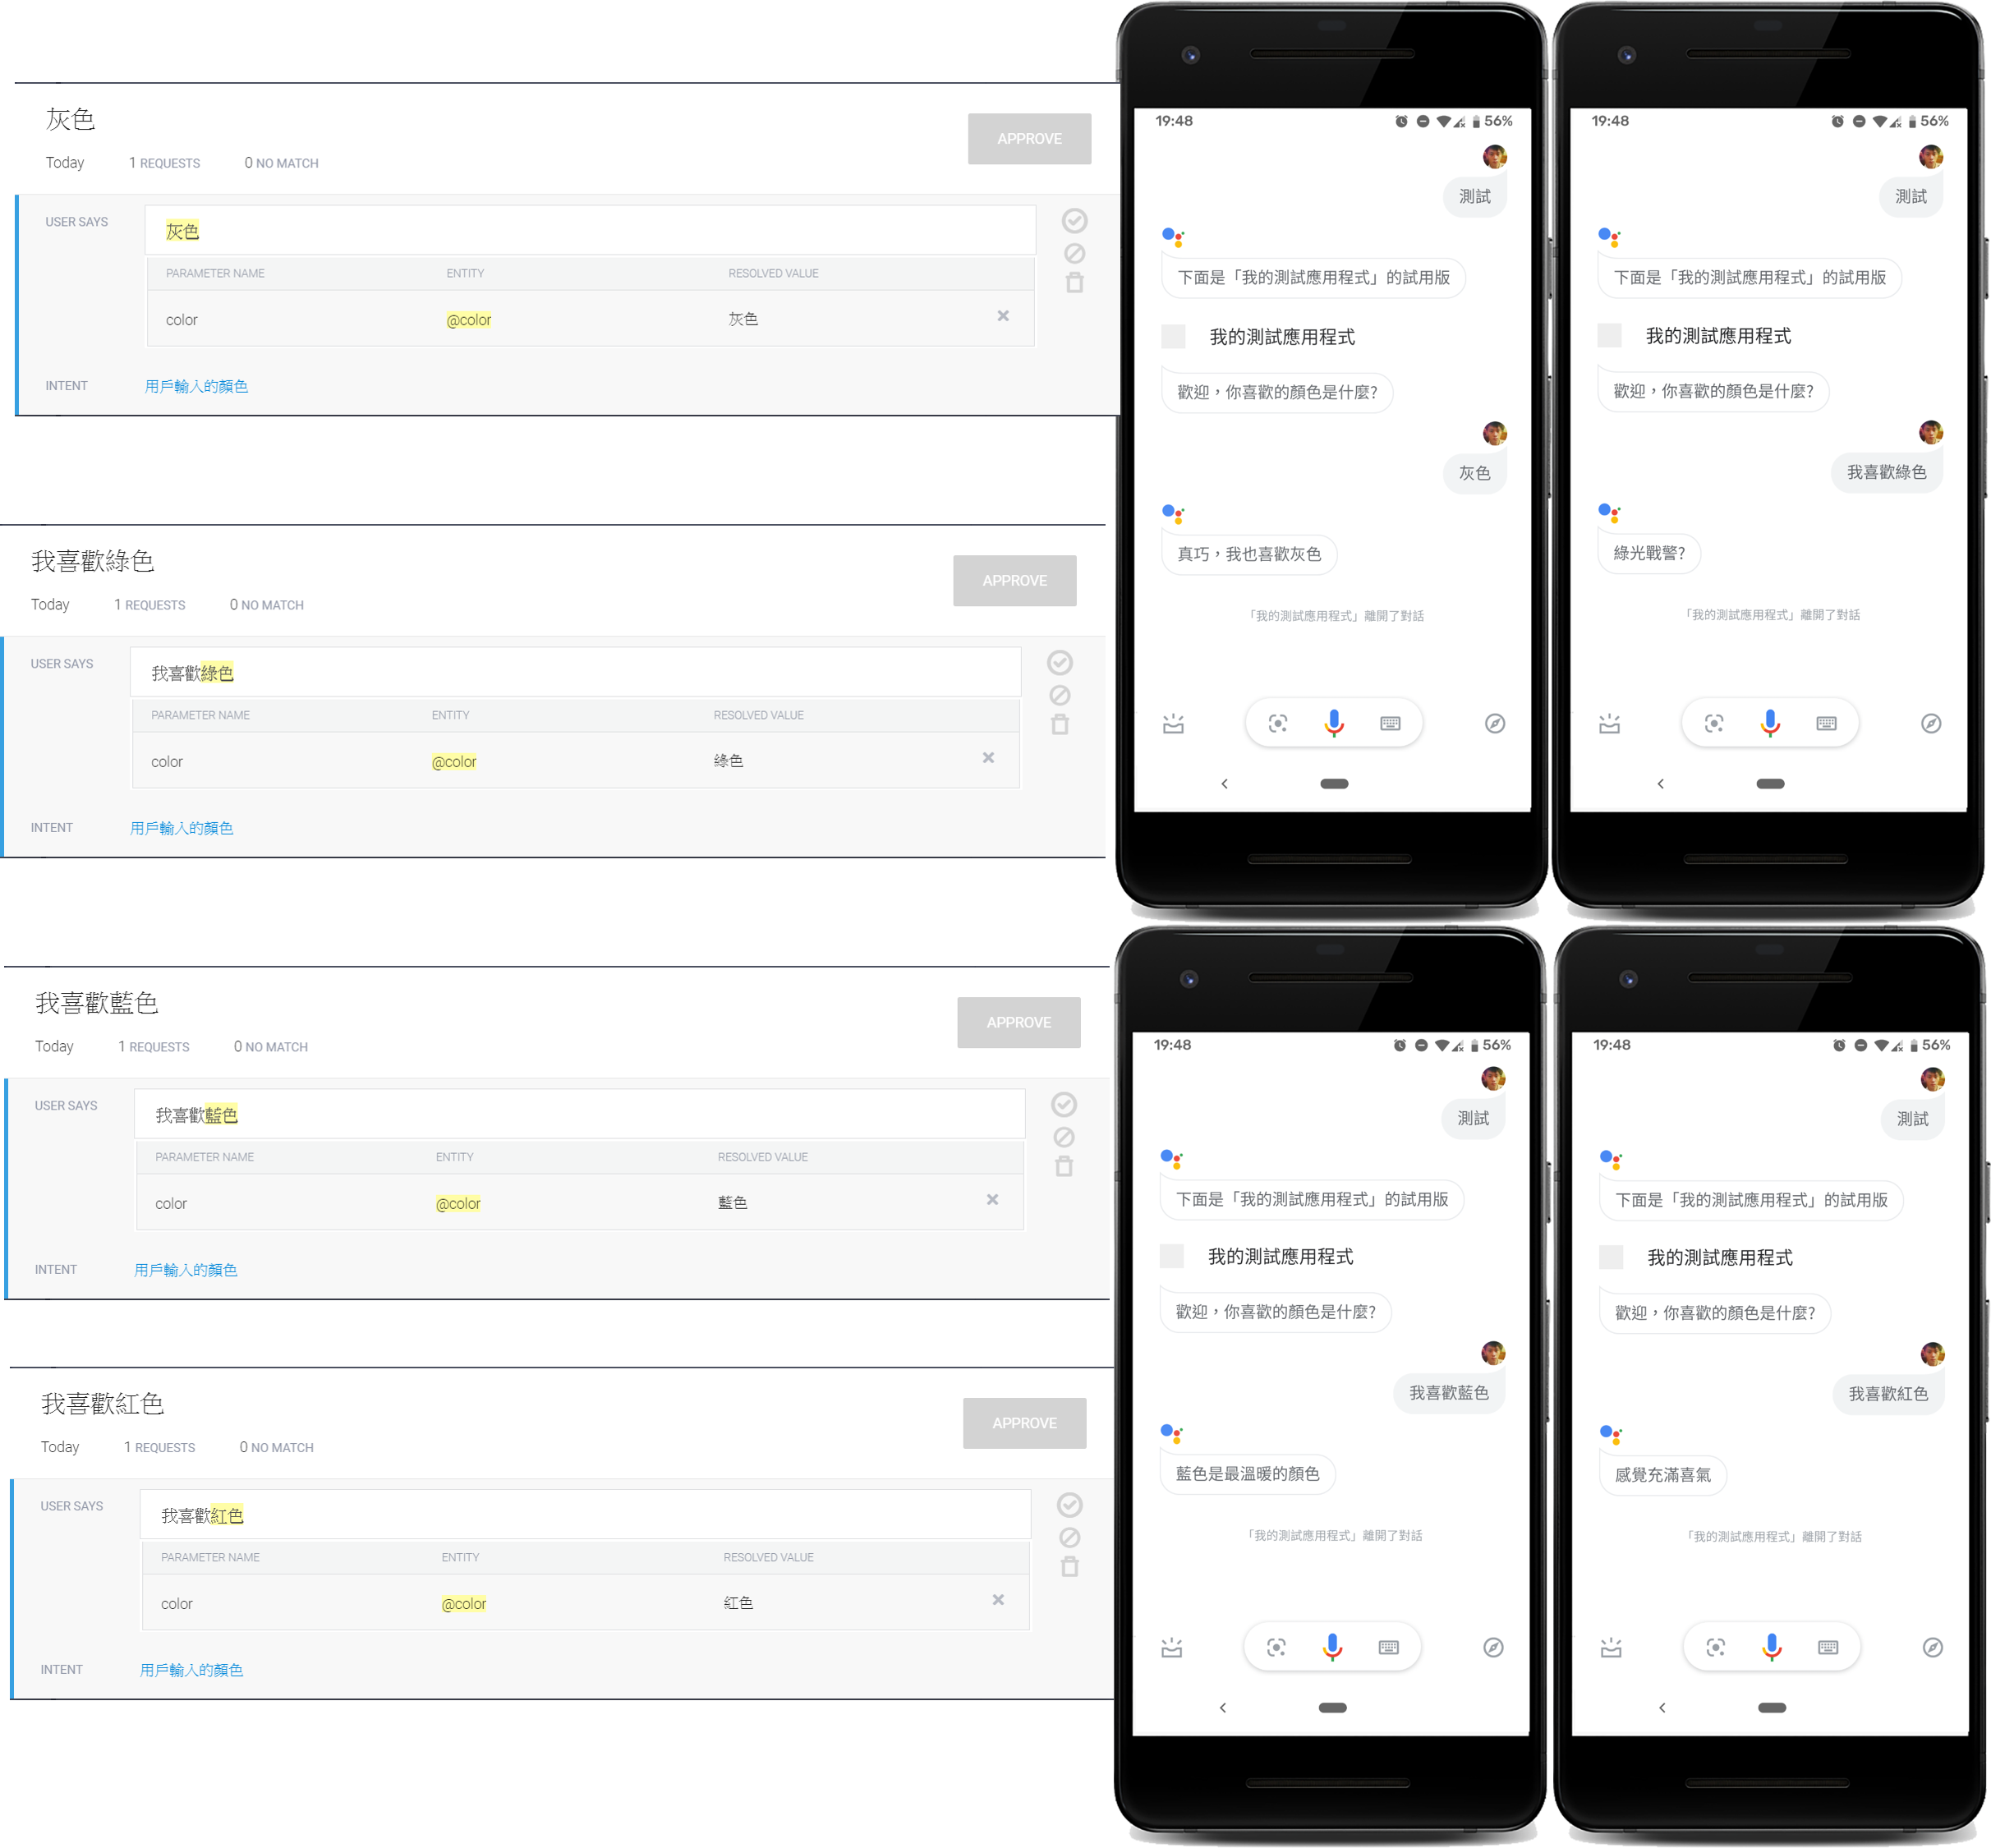
image

參考資料

在這裡所使用的Fulfillment是在DialogFlow上透過Google Cloud Function所建構的。
你也能夠在Google Cloud Platform或Firebase上進行編輯。
詳情請參考下列的網址:

接下來…

我們將會從語音使用者介面設計的角度,
探討與對話流設計息息相關的**長尾問題 (long tail problem)**。
並了解如何應用它使Action能專注在主要的目的上並增進使用體驗。

以行動支持我

歡迎關注我的其它發布渠道